Kangaro SE
Start with confidence.
Child-safe, playful essentials for early learners: glue, ruler, eraser-sharpener, plastic scissors, magnifier and paper punch.
Manufacturing Techniques · Group studio · Semesters 3–4
Thirteen loose tools.
One study system.
00 / The brief
A two-semester manufacturing studio
The assignment asked our group to imagine a stationery kit for Kangaro. The real project, however, was larger than a box: understand existing products, pull them apart, learn how every part is made, generate alternatives, cost the system, and carry one direction through to a final design.
Unorganized academic tools.
Unmet learning needs.
The opportunity was not another pencil case. It was an academic command centre.Kangaro SE
Child-safe, playful essentials for early learners: glue, ruler, eraser-sharpener, plastic scissors, magnifier and paper punch.
Kangaro SE+
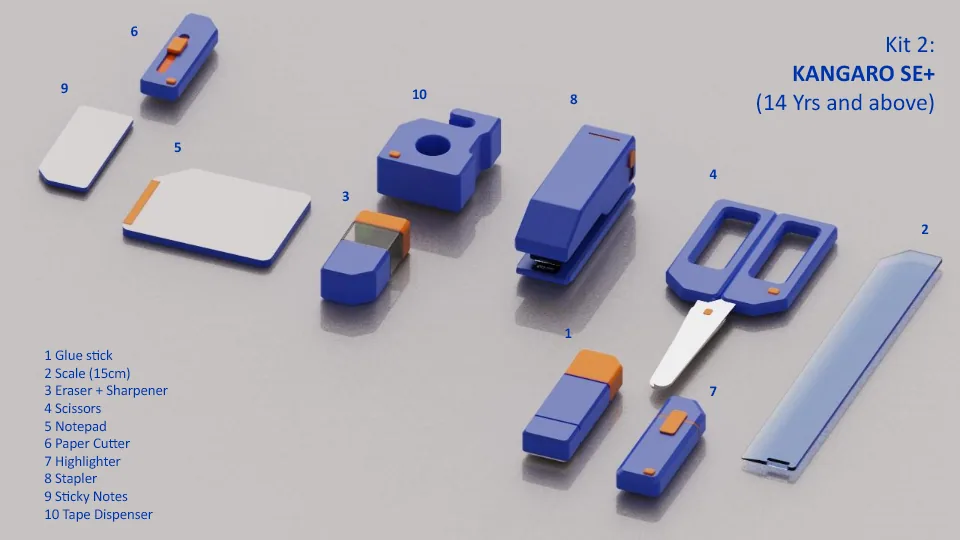
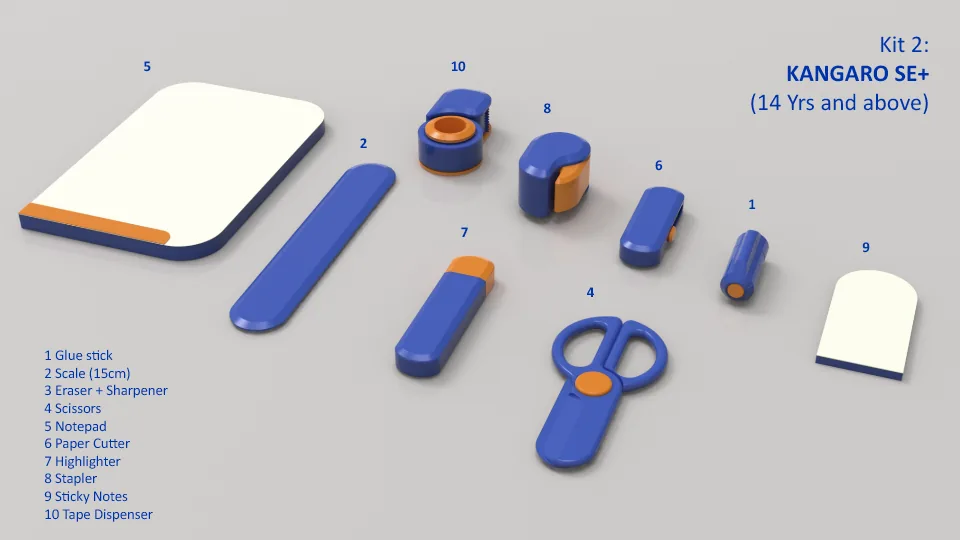
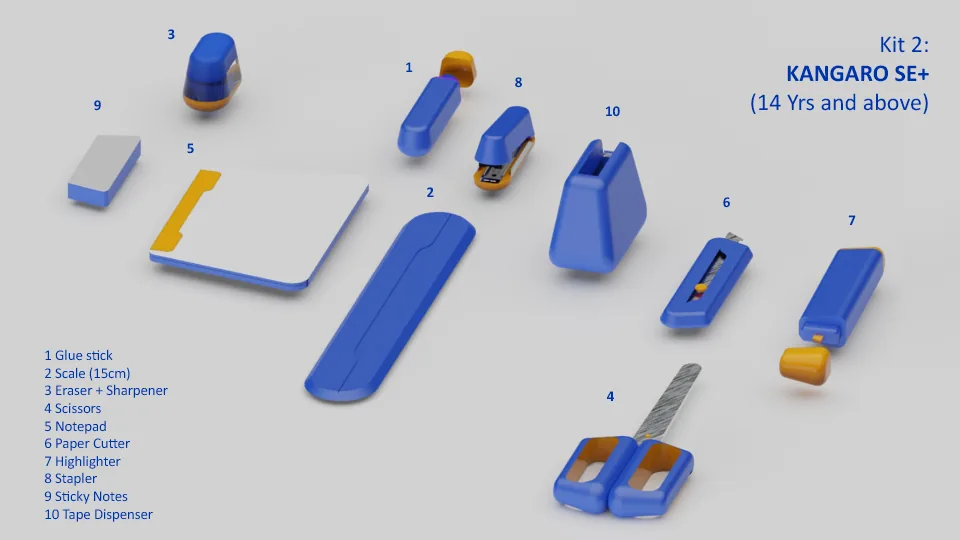
A compact set for older students: highlighter, cutter, stapler, scissors, notepad, glue, tape dispenser and steel ruler.
The full arc
Each phase reduced uncertainty. Market evidence set the language; teardown exposed the processes; concepts tested organization; costing forced the final geometry to become credible.
Online and local-market study across 12 categories.
Parts, weights, materials, finishes and joining logic.
Seven organizational concepts and individual tool redesigns.
Three 3D systems carried into packaging studies.
BOM, raw material, moulding, sheet-metal and bought-out parts.
A two-tier kit with visible contents and direct access.
01 / Research & benchmarking
Online + offline
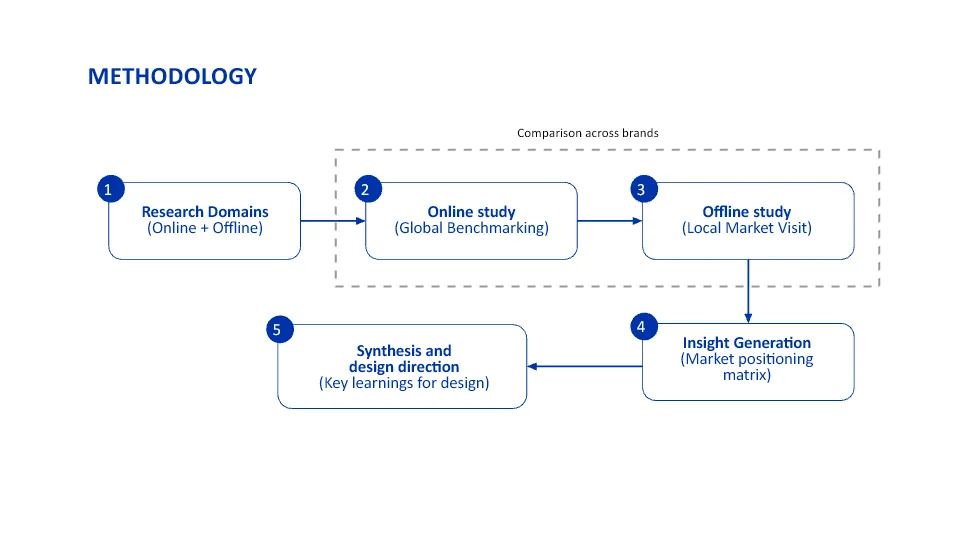
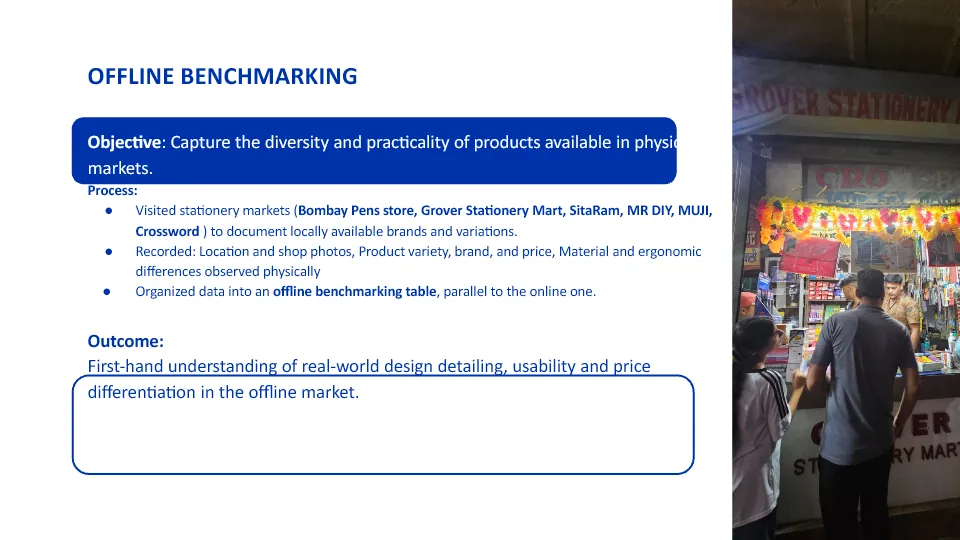
We compared products across major online platforms, then visited Bombay Pens, Grover Stationery Mart, SitaRam, MR.DIY, MUJI and Crossword. The goal was to understand not only what was sold, but why certain products felt safer, clearer, easier or more desirable.
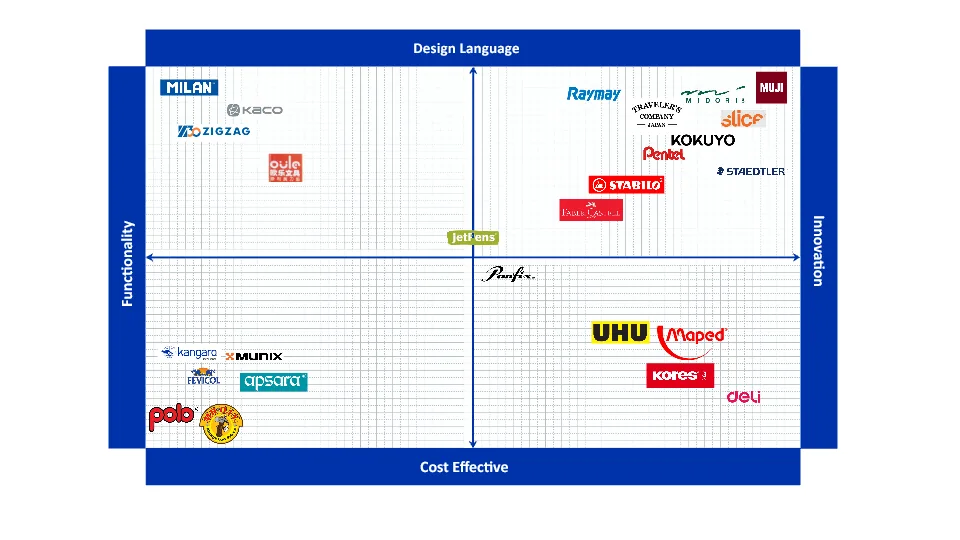
Signals carried forward
Rounded blades, guarded edges and enclosed mechanisms help a child understand where to hold.
Chunky barrels, finger grooves and high-contrast touch zones reduce hesitation.
Every product needs a visible home, a direct removal path and a clear return position.
Playful proportions support early learners; precision and restraint better suit older students.
02 / Product teardown
The inside became the curriculum
Products were photographed, opened and catalogued part by part. The exercise connected form to material and material to process—from injection-moulded housings to blanked blades, springs, rivets, lenses and bought-out consumables.
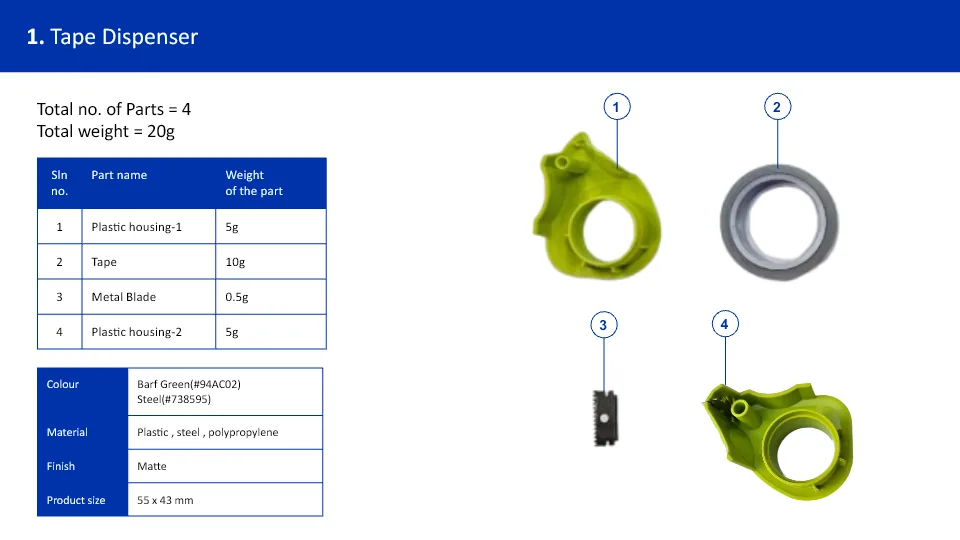
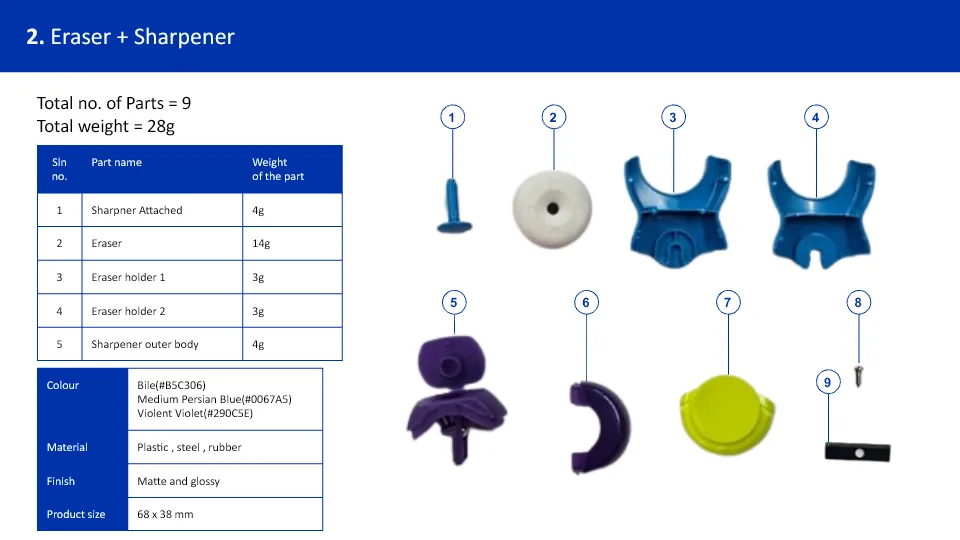
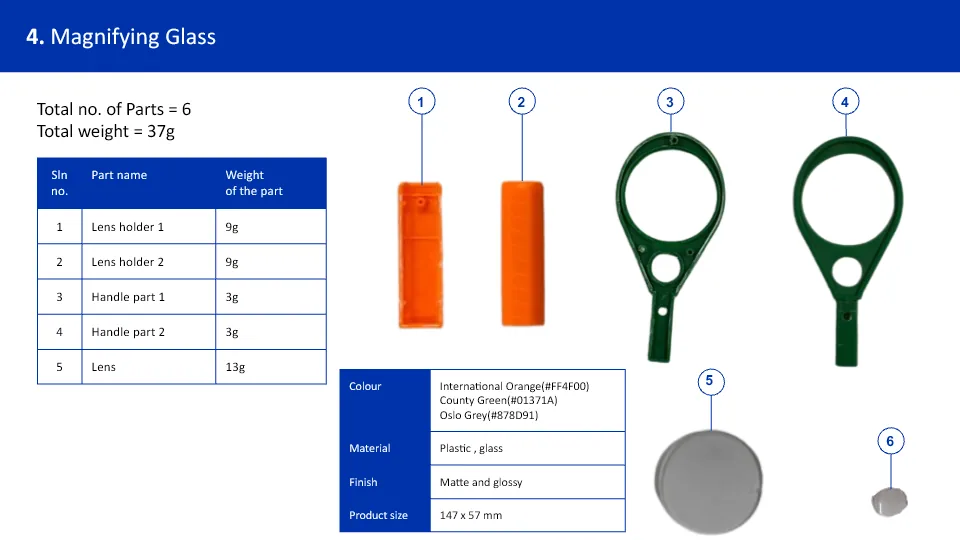
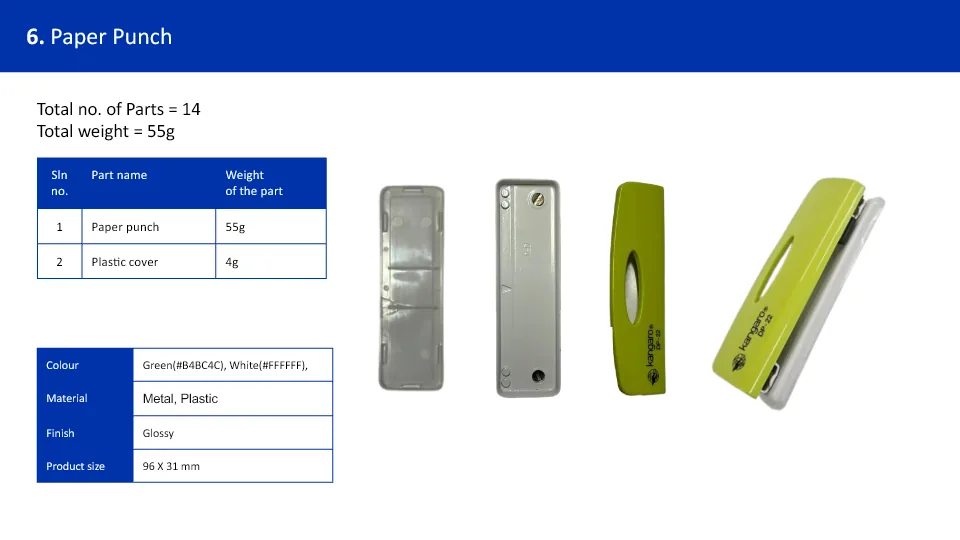
| Product | Parts | Weight | Primary materials | Manufacturing signal |
|---|---|---|---|---|
| Tape dispenser | 4 | 20 g | PP · steel · BOPP | Injection moulding + sheet-metal blanking |
| Eraser + sharpener | 9 | 28 g | PP · rubber · stainless steel | Moulded nested housings + fastener |
| Paper cutter | 4 | 10 g | ABS · PP · SS-304 | Moulded housing + hardened blade |
| Magnifying glass | 6 | 37 g | PP · PMMA | Injection-moulded frame + optical lens |
| Paper punch | 14 | 55 g | CRCA · PP · spring steel | Press forming + moulded cover |
| Stapler | 8 | 23 g | ABS · galvanized CRCA | Sheet-metal forming + moulded casing |
A curved surface was no longer just styling. It implied draft, split lines, wall thickness, tooling and cost.
03 / Concept generation
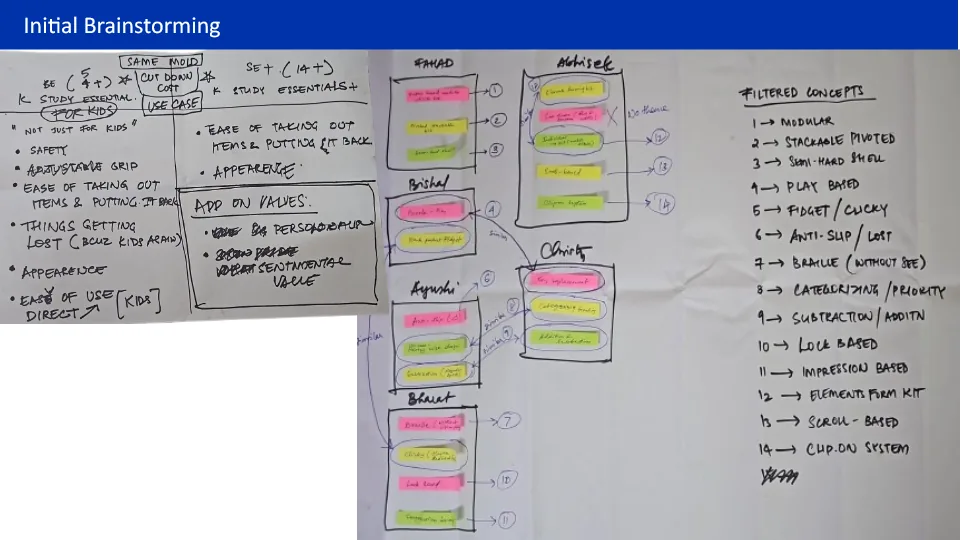
Seven organizational logics
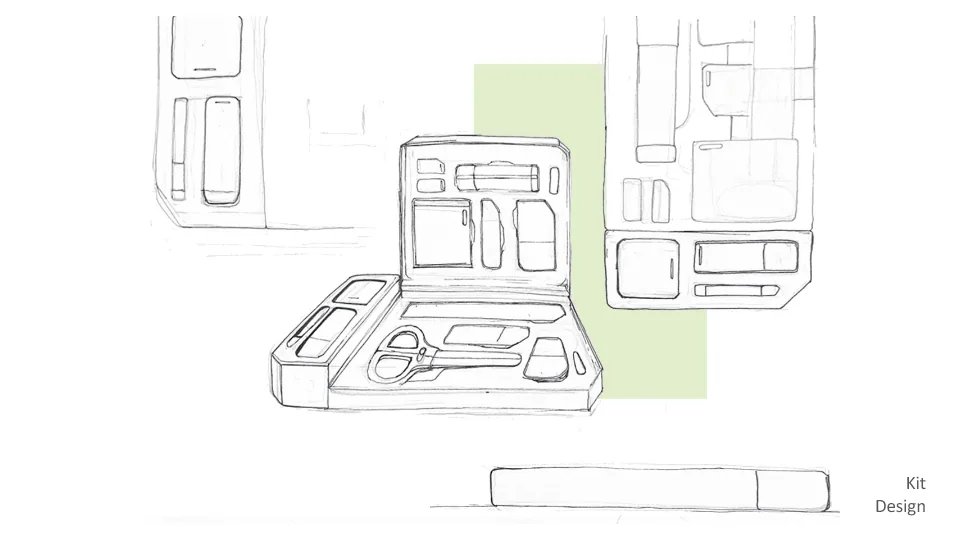
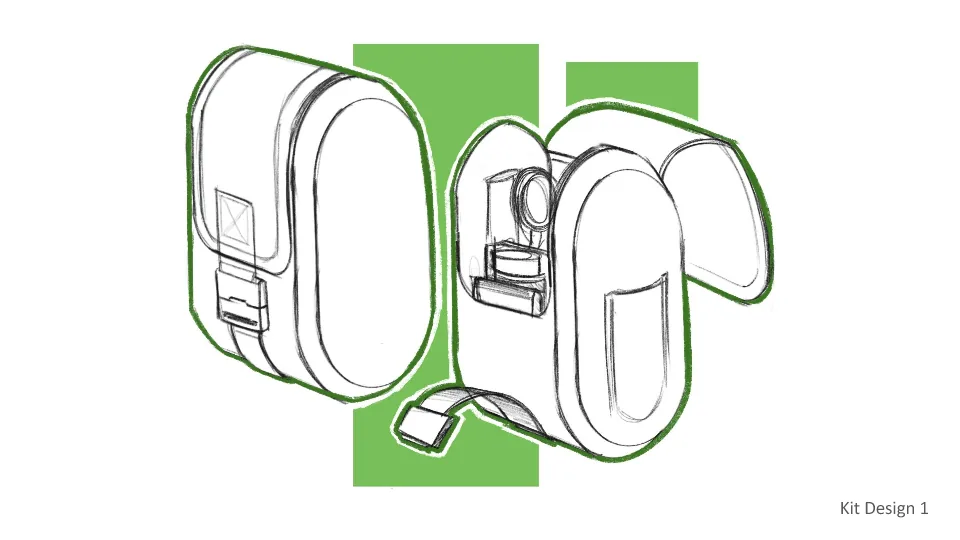
Instead of styling one box seven times, the team tested seven verbs. Each name described a different way the kit could open, connect, transform or guide use.
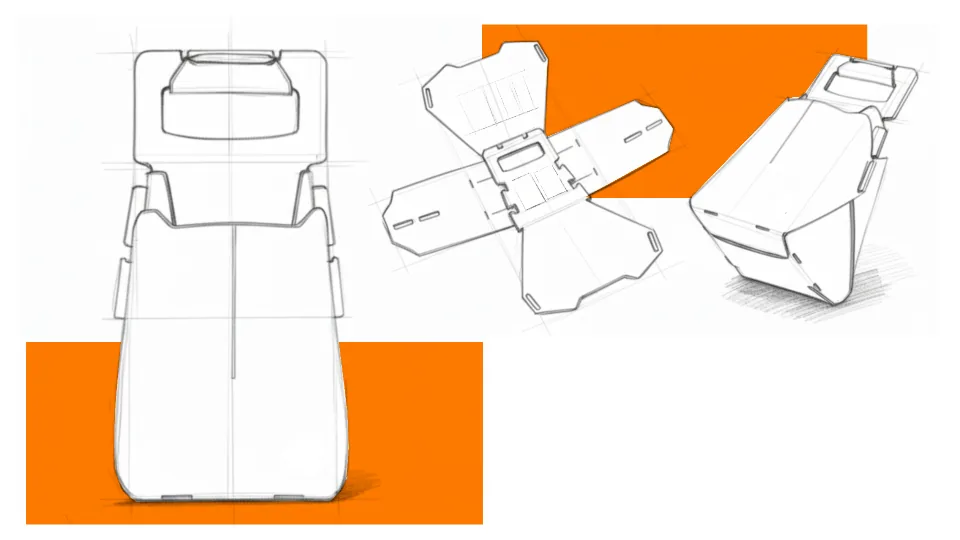
Fold and reconfigure.
Secure a flat kit around its tools.
Dock tools into modular housings.
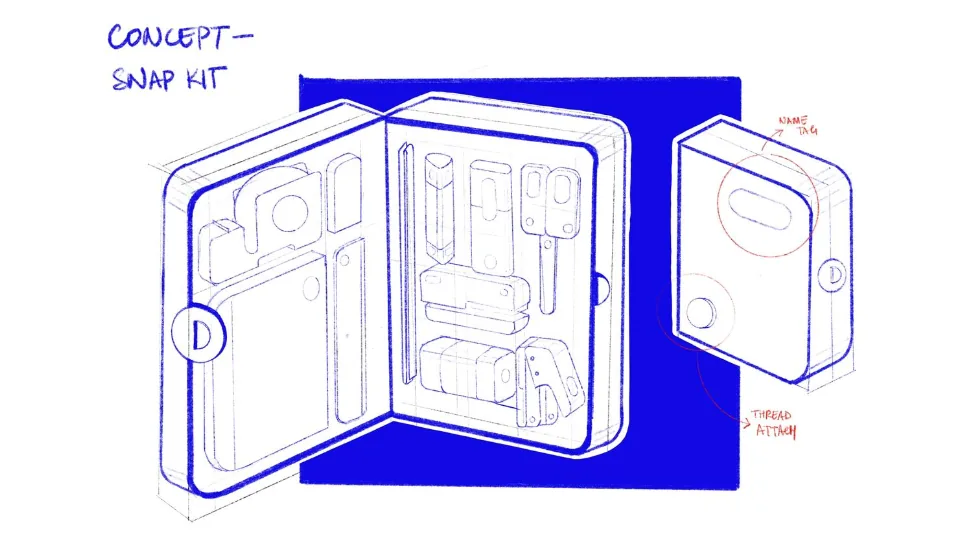
Use tactile closure and attachment.
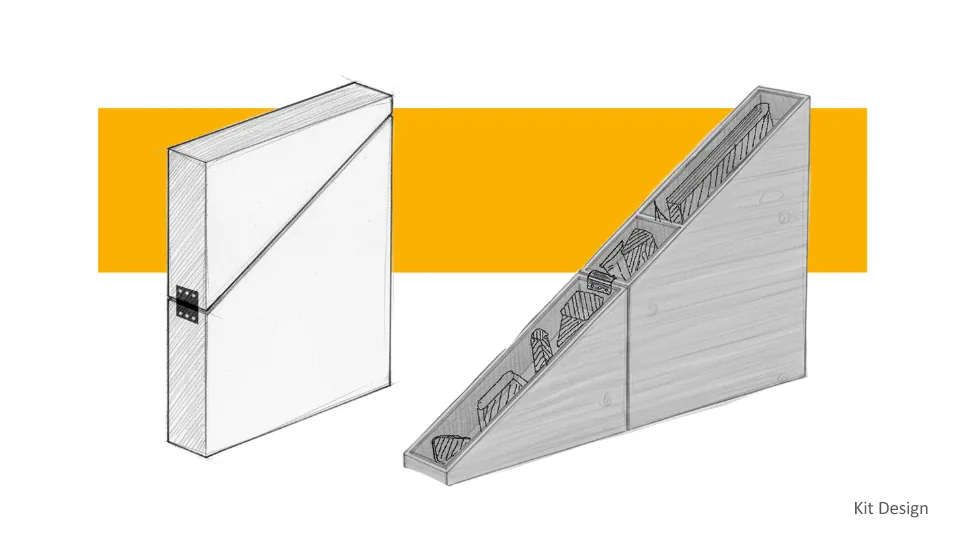
Turn storage into a desk structure.
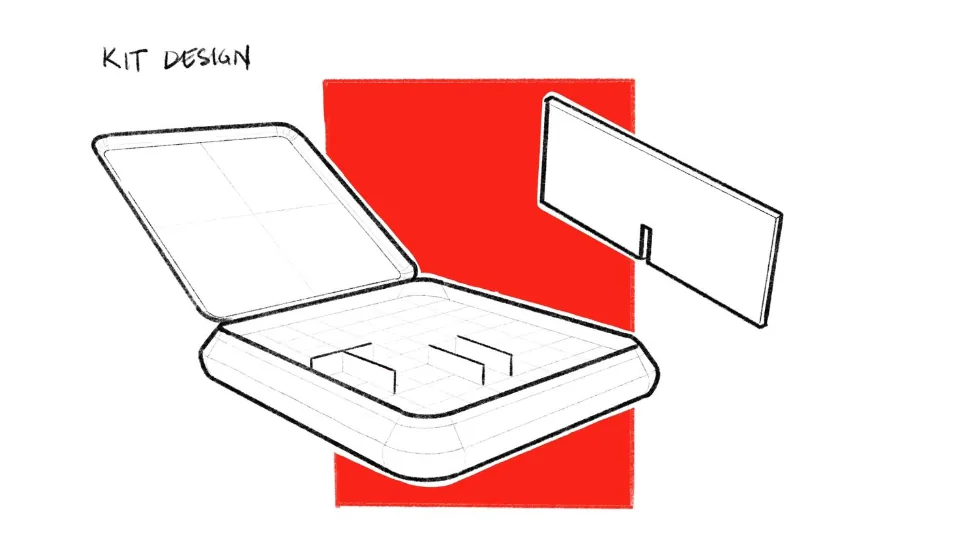
Make readiness visible at a glance.
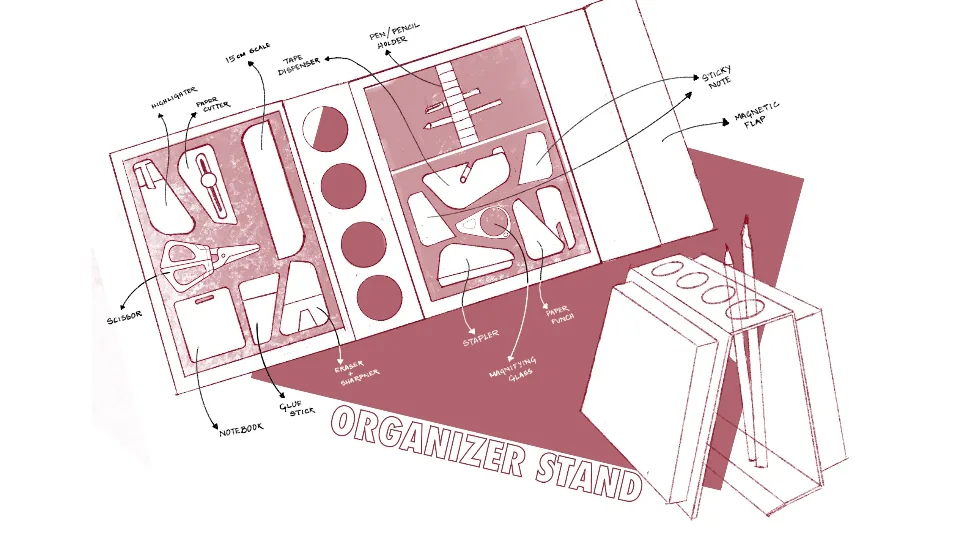
Open into an organized workstation.
From seven to three
Lock-It, Click-It and Tick-It were translated into 3D arrangements. Full-size product envelopes exposed unused volume, difficult removal paths and tray conflicts, helping the team move toward a compact layered system.
04 / Manufacturing & cost
Form had to survive the spreadsheet
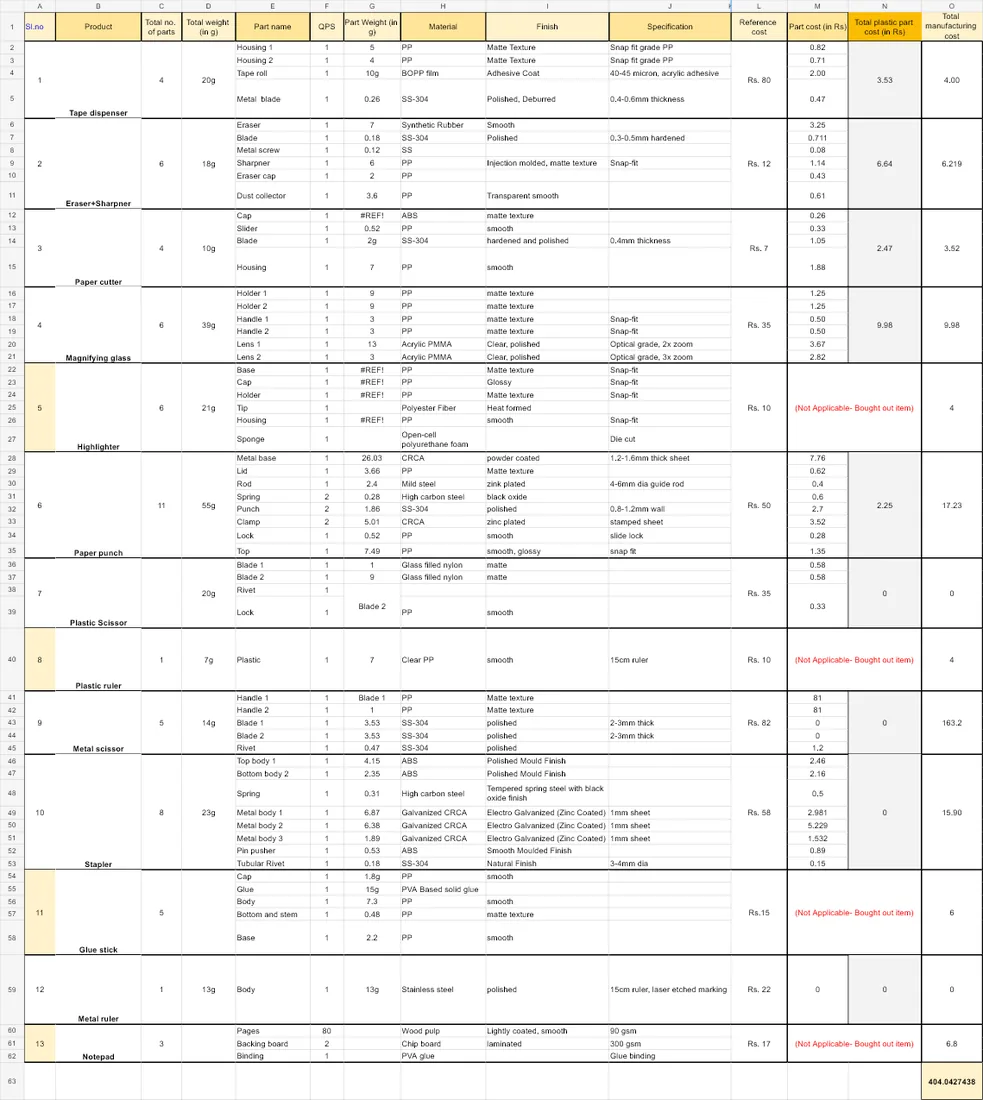
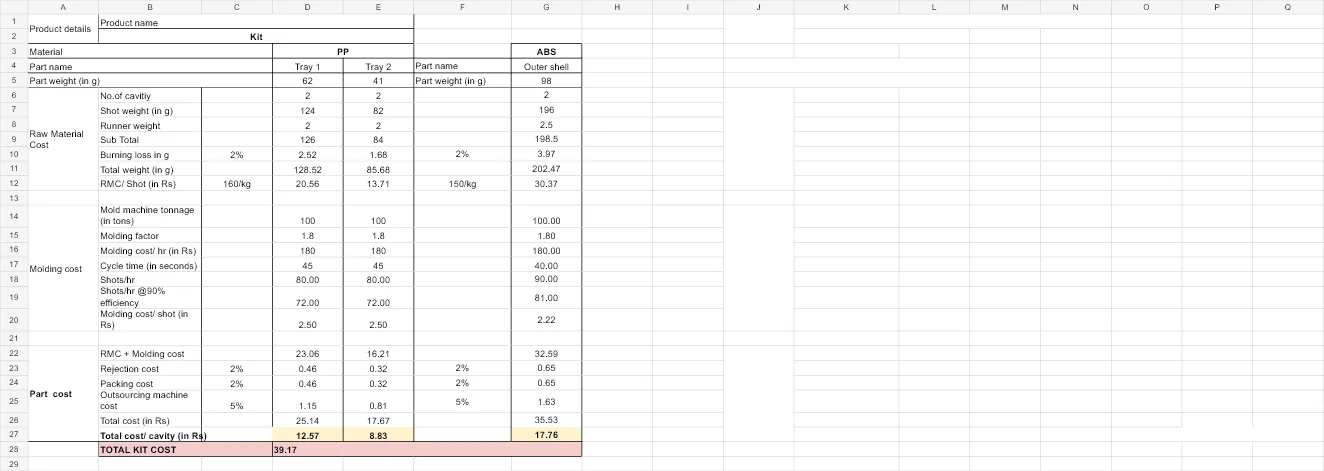
The final phase connected design to production. We modelled raw material, cavity count, runner and burning loss, cycle time, rejection, packing, outsourcing and per-part costs—then tested what the kit could realistically contain.
PP and ABS housings, trays, caps and grips; draft, wall thickness, snap fits and cavity strategy shaped the geometry.
Blades, stapler bodies and paper-punch structures used blanking, bending, forming and protective finishes.
PMMA lenses, paper, adhesive tape, glue and ink were treated as specialist or bought-out components.
Snap fits, rivets, pins, springs and nested trays were chosen according to service, load and part count.
Cost as feedback
Later layout studies compared different tray-and-shell architectures across this estimated manufacturing range. The figures were used as design feedback, not presented as final retail pricing.
05 / Final design direction
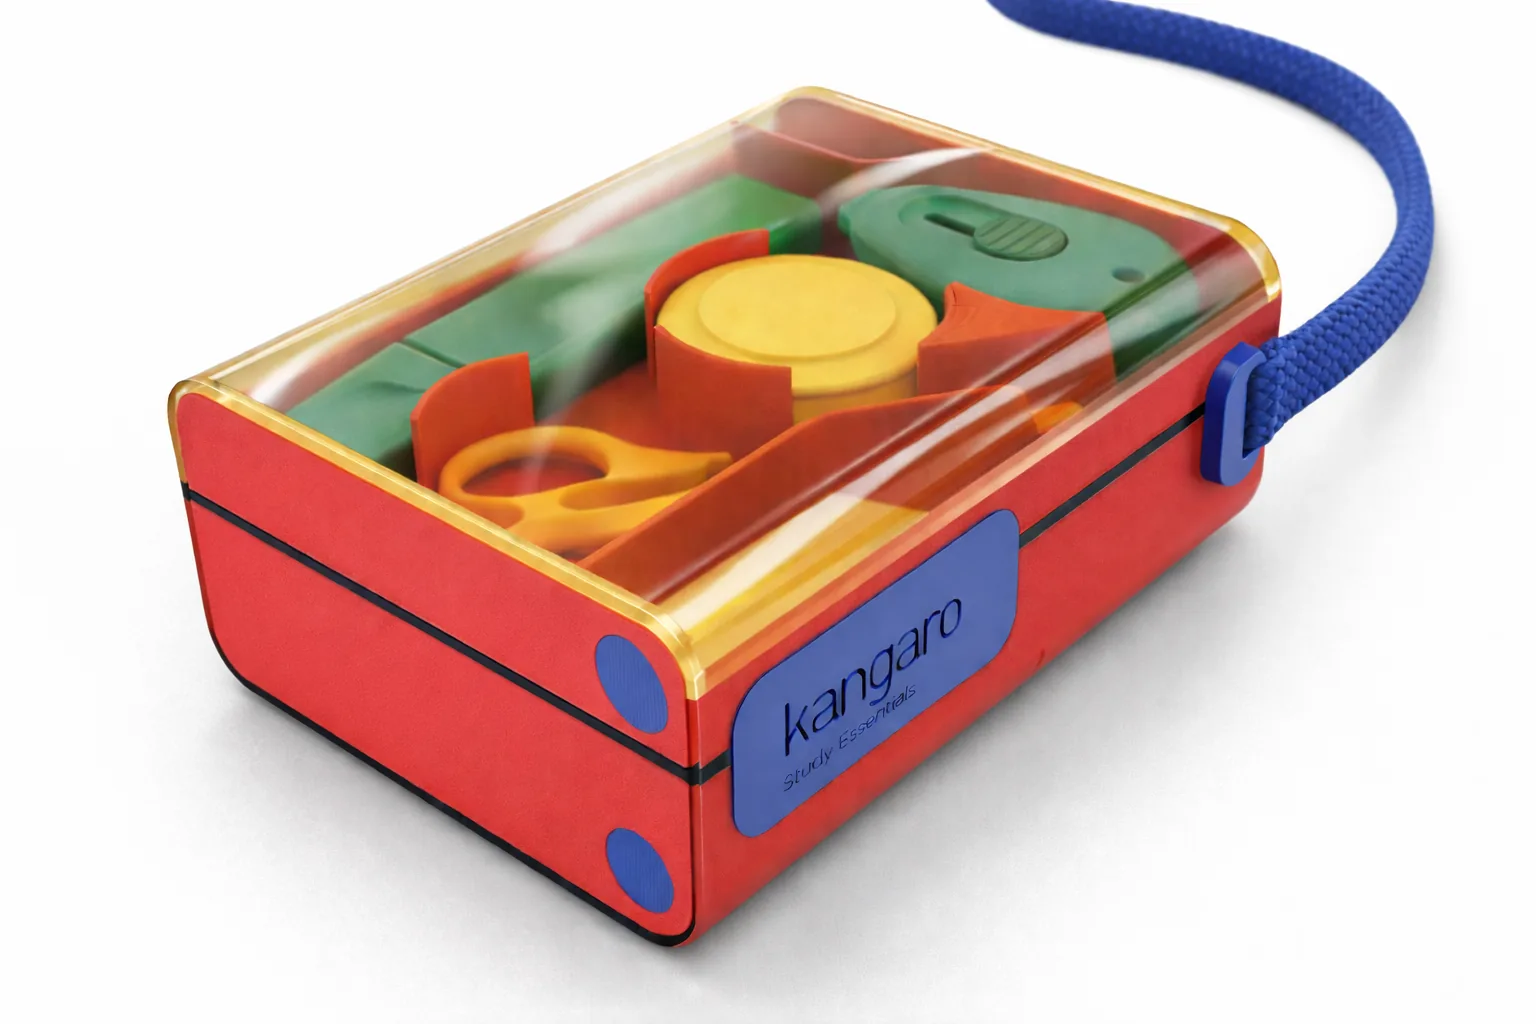
Kangaro Study Essentials
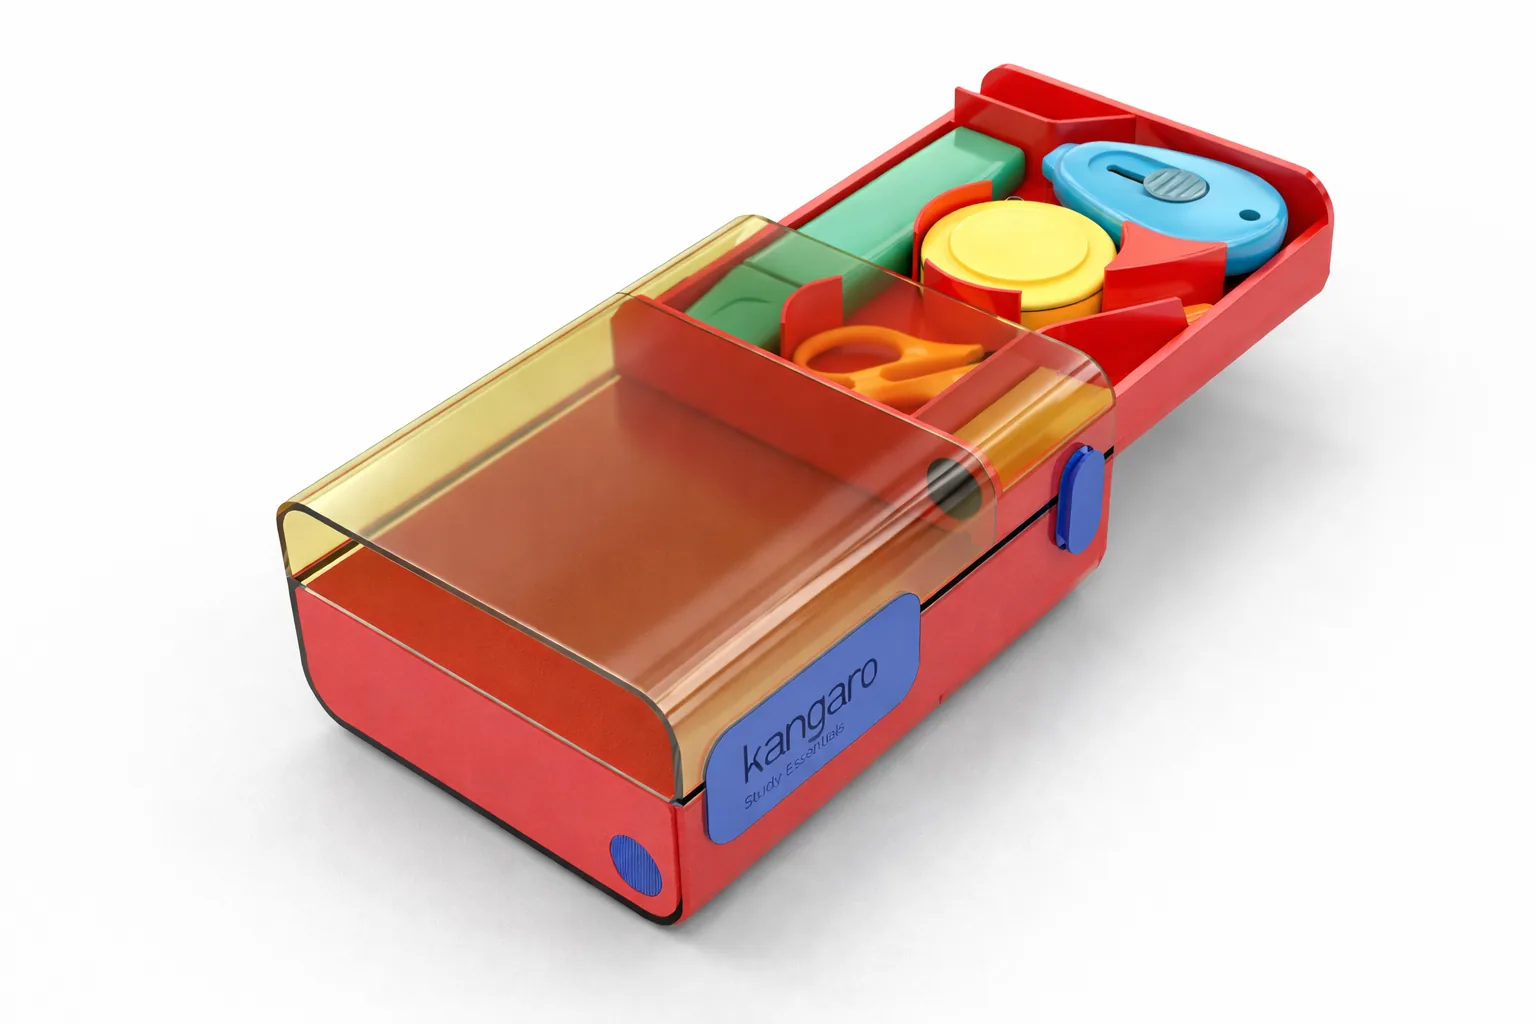
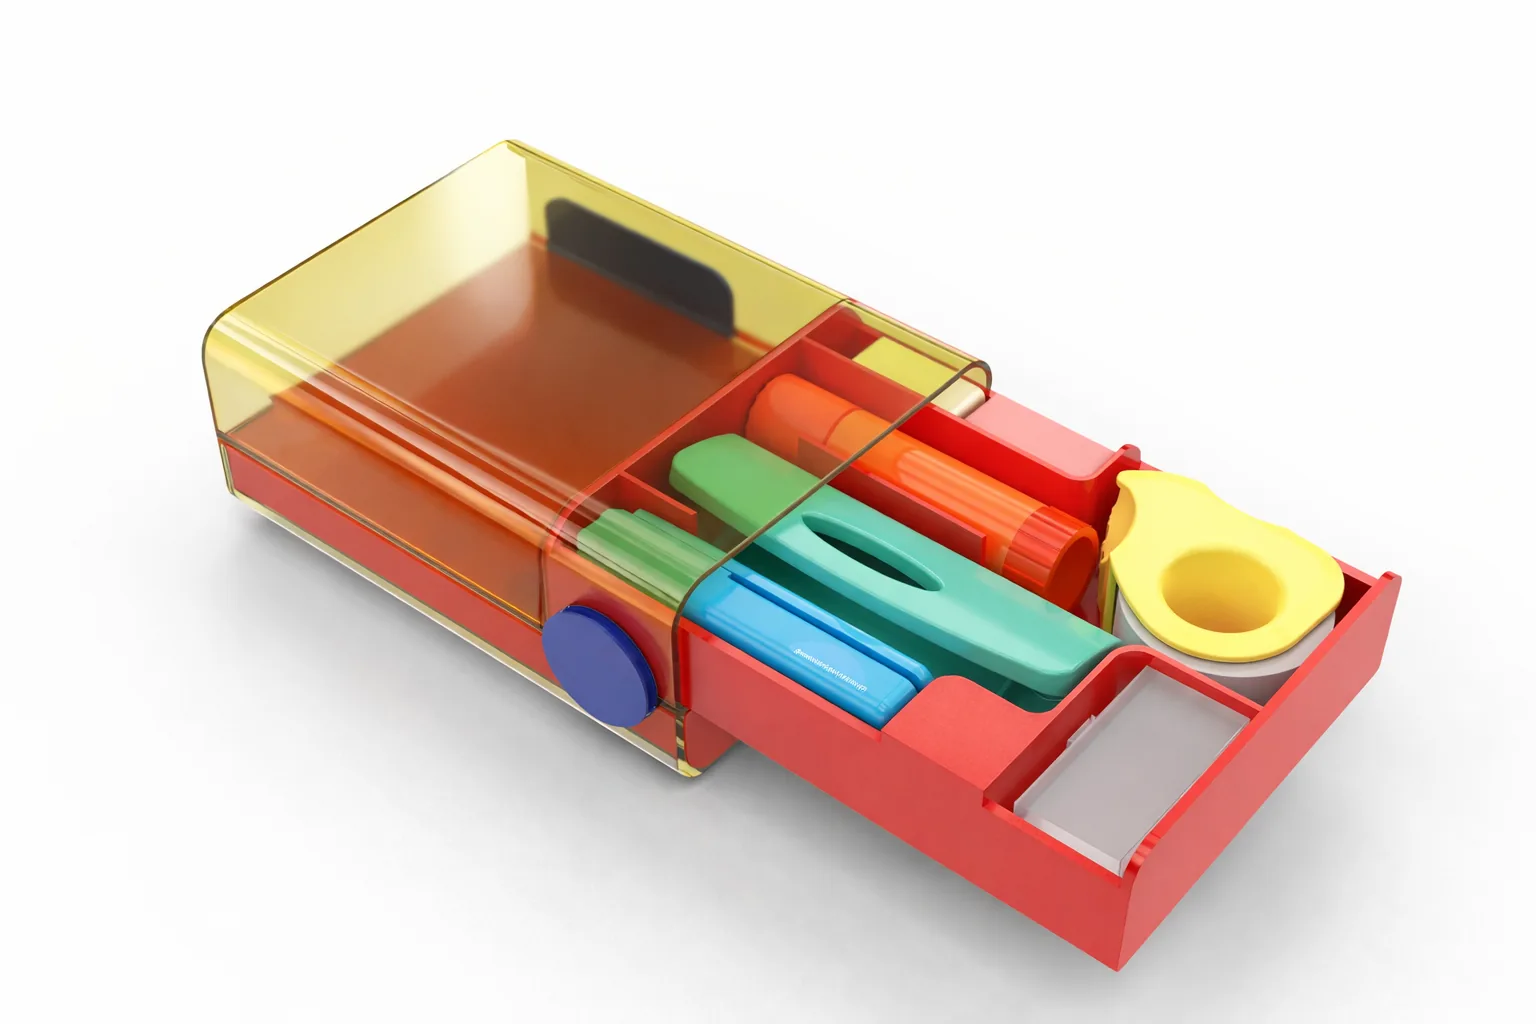
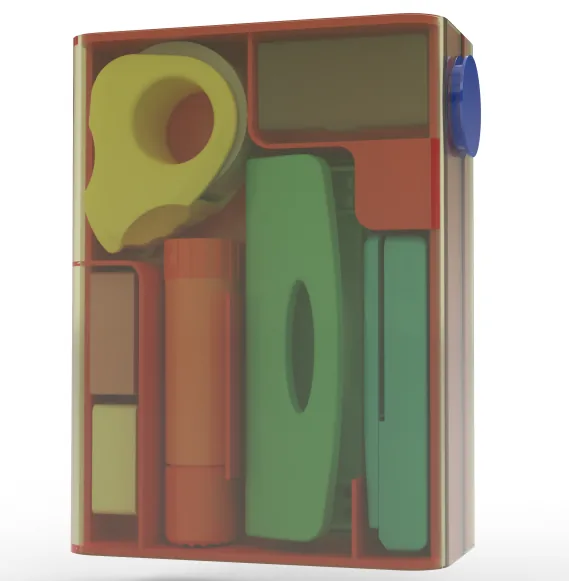
The resolved kit keeps every tool visible beneath a translucent shell. Two dedicated trays separate tasks without hiding the contents, while side controls and a carry loop turn opening and transport into clear, memorable interactions.
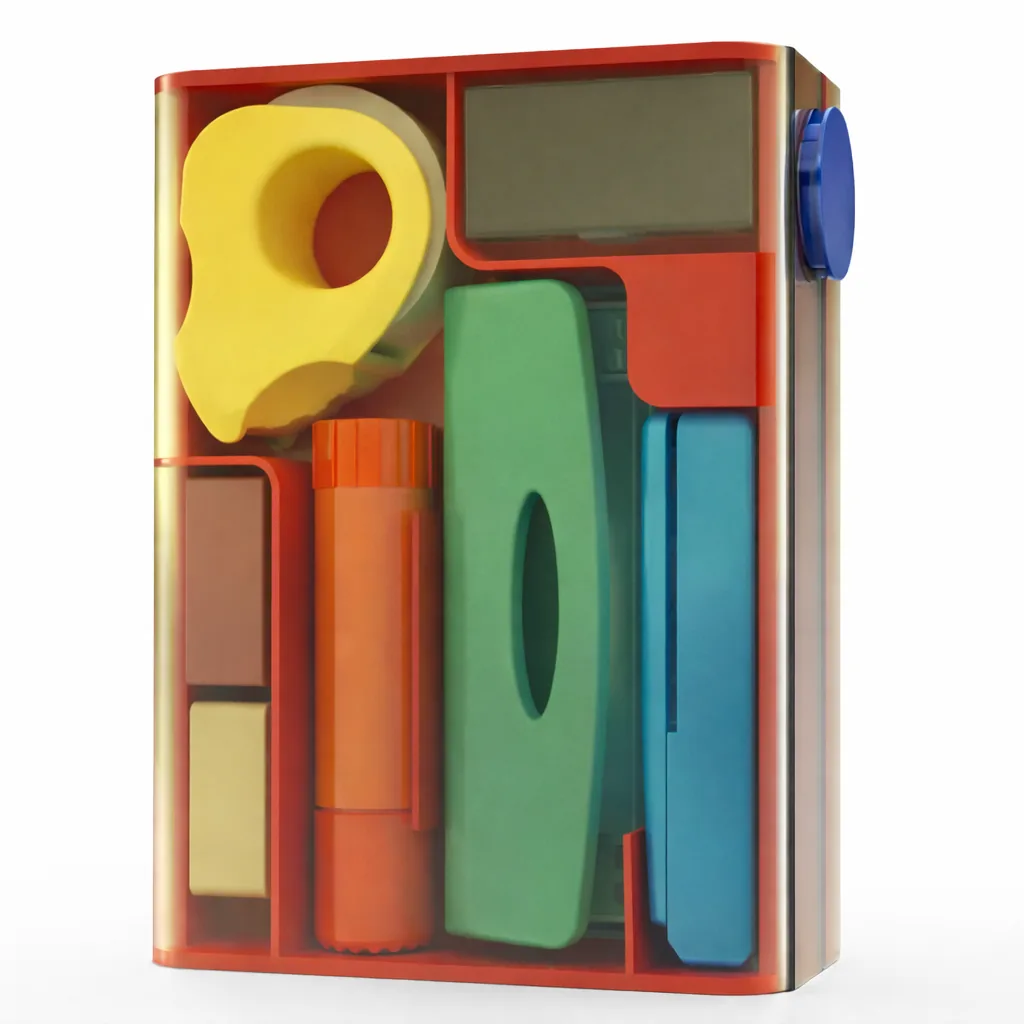
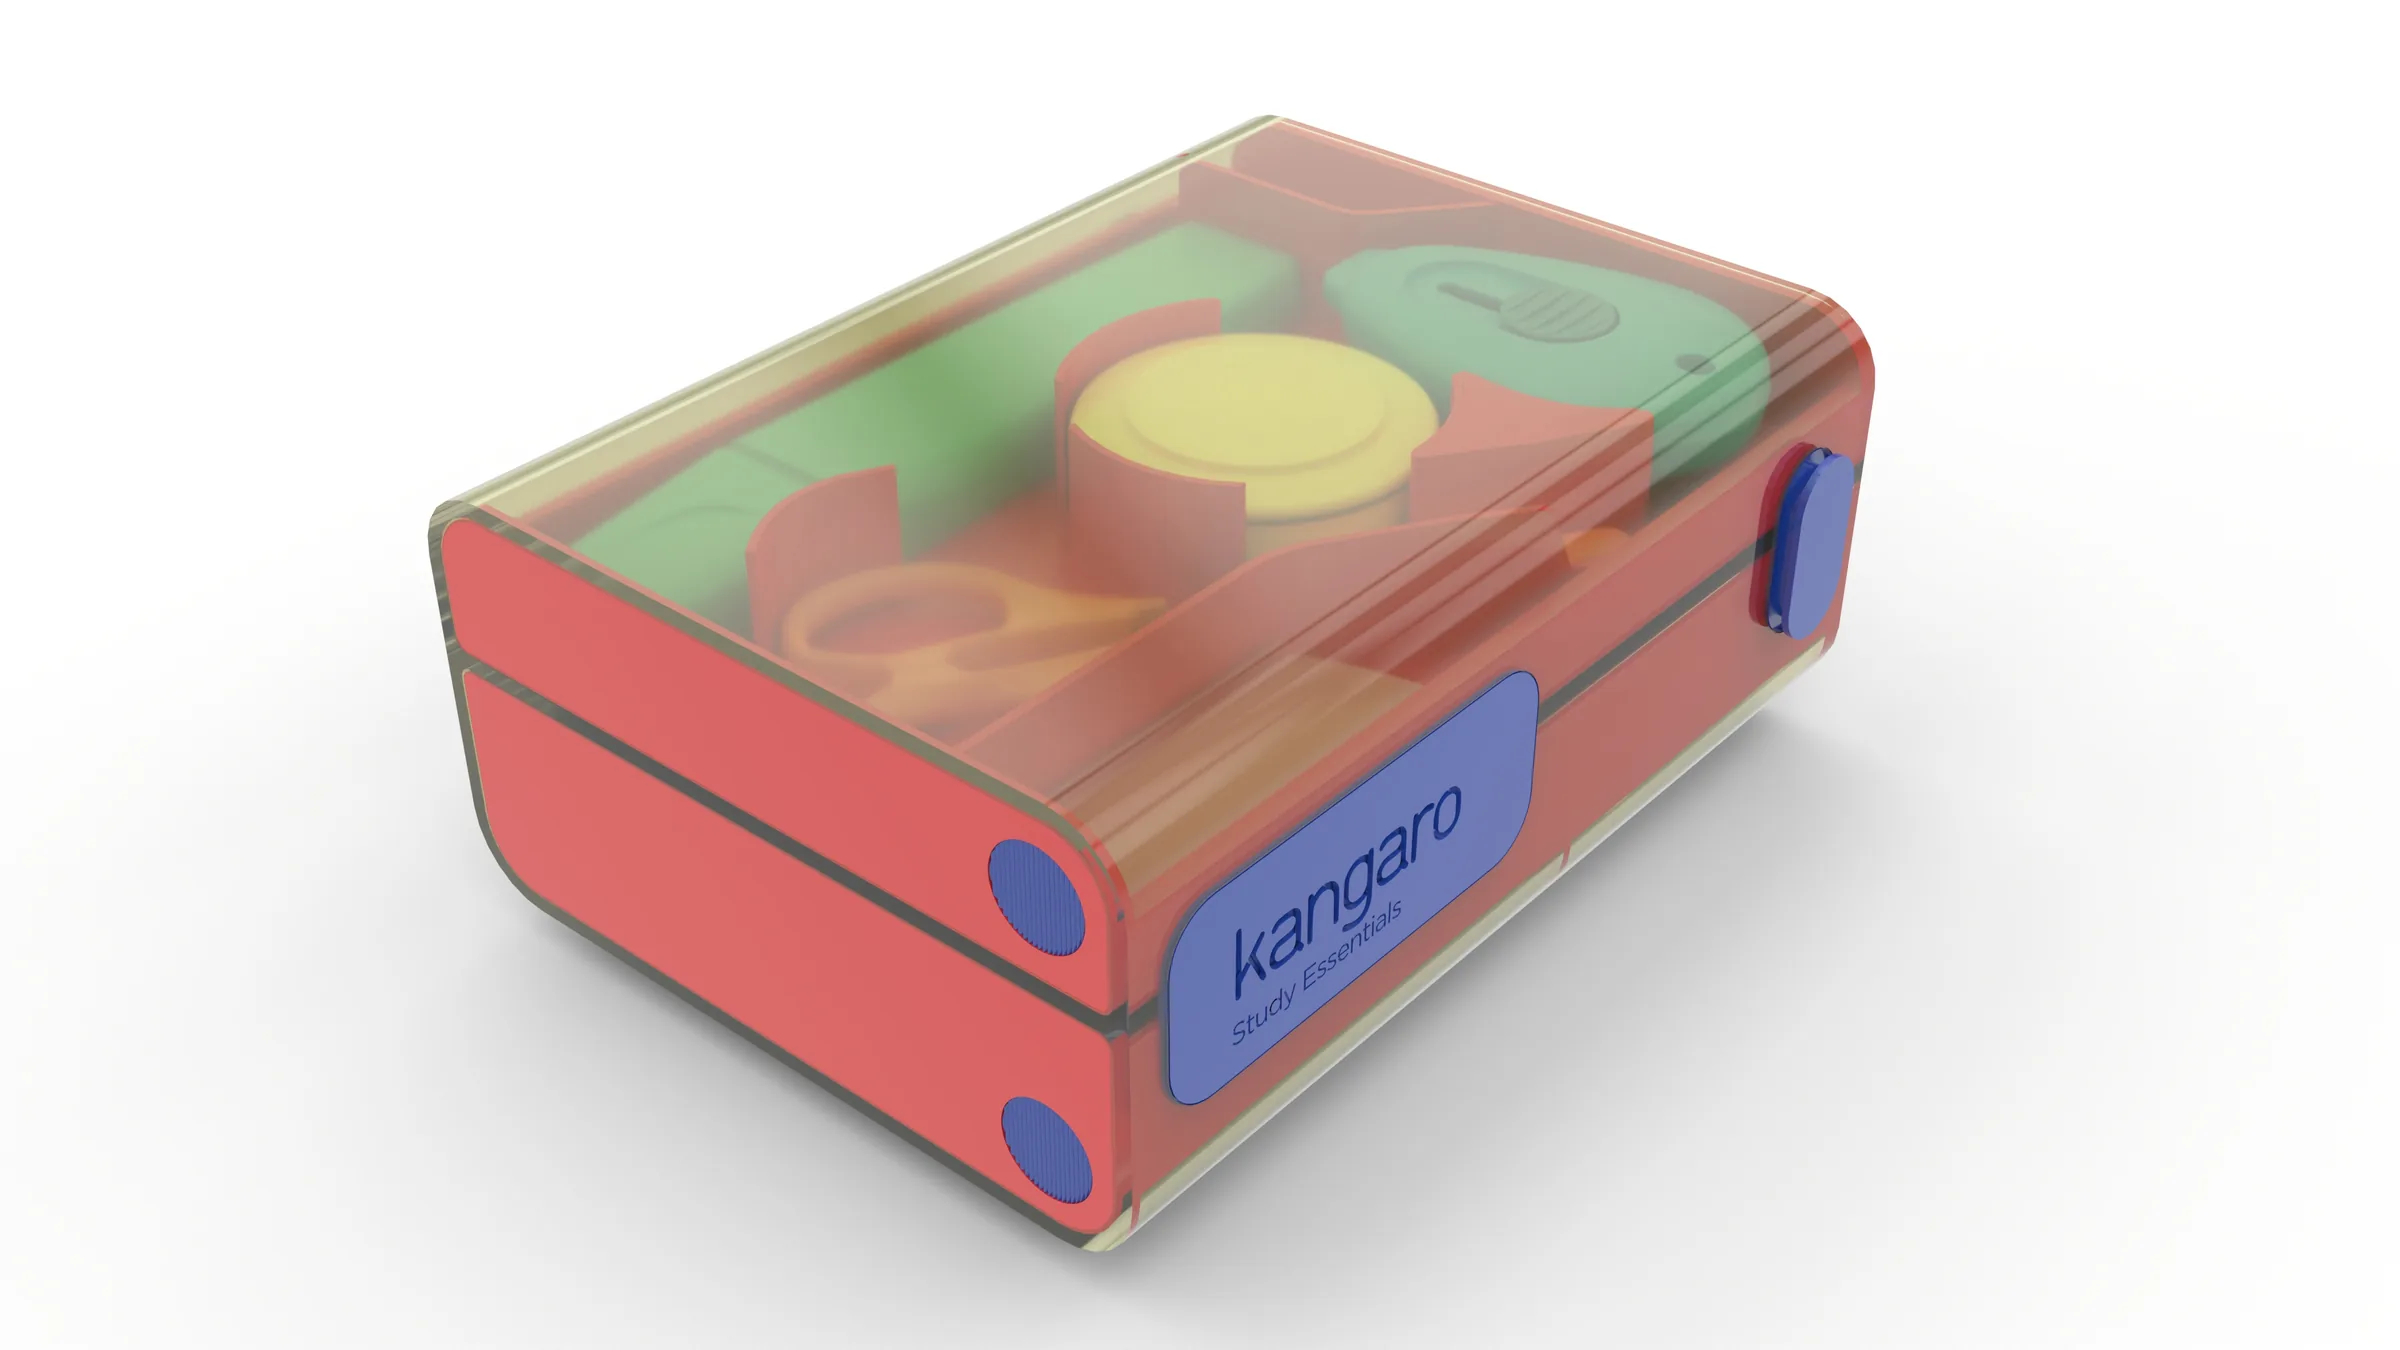
Closed / protected and immediately legible.
The translucent enclosure makes absence obvious before the student leaves home.
Independent trays prevent one task from disturbing the whole kit.
Dedicated pockets reduce rattling and teach where each tool returns.
Bright colour blocking and a carry loop give the system a recognisable character.

The intended moment
Less time hunting.
More time making.
Context visualization—not a photographed user test.
06 / Reflection
What the studio changed
Across two semesters, the project made process visible inside every decision. A radius could improve safety but complicate tooling. A clear shell could support inventory but change material and finish. A compact plan could save volume but make removal difficult. The final design came from negotiating those relationships, not styling around them.
Source archive reviewed for this case study: 8 decks · 272 slides · 468 embedded visuals · 13-sheet BOM and costing workbook.